
If your dog is choking right now, go straight to the steps below.
Come back to read the rest when your dog is safe.
Is Your Dog Actually Choking?
Dogs gag, cough, and retch for a lot of reasons. Knowing the difference matters, because a dog that's actively choking needs you to act in the next few minutes.
Signs of choking:
- Pawing frantically at the mouth or face
- Struggling or gasping to breathe
- High-pitched breathing or no breathing at all
- Blue, white, or gray gums or tongue
- Panic, bulging eyes
- Collapsing or going limp
Not choking (but worth watching):
- Occasional coughing or gagging that resolves on its own
- Reverse sneezing — a strange honking sound that stops by itself
- Retching without distress
If your dog is panicking, pawing at their mouth, and struggling to breathe, that's choking. Move now.
Step 1: Check the Mouth
Stay as calm as you can. A panicking dog may bite even someone they love. Use a firm but gentle hold.
Open your dog's mouth and look inside. If you can see the object and reach it safely, pull it out. Use a sweeping motion with your finger — but only if you can clearly see what you're removing. If it's not visible or you can't get a clear grip, do not sweep blindly. Pushing the object deeper makes things worse.
If you can see a bone lodged in the throat, don't try to remove it yourself. Bones can injure the throat. Get to the vet.
Step 2: Abdominal Thrusts (Heimlich Maneuver)
If the finger sweep didn't work, move immediately to abdominal thrusts.
Large dogs (standing):
- Stand or kneel behind your dog.
- Wrap both arms around their waist, just in front of the hind legs.
- Make a fist with one hand and place it just below the rib cage.
- Cover your fist with your other hand.
- Give 5 rapid thrusts inward and upward.
- Check the mouth. Remove the object if you can see it.
Small dogs:
- Hold your dog on your lap, turned onto their back.
- Place the heel of one hand just below the rib cage.
- Push firmly inward and upward 5 times.
- Roll your dog back onto their side and check the mouth.
Large dog on their side: Place one hand on their back for support. Use the other hand to push the abdomen upward and forward toward the spine, 5 times. Check the mouth.
Step 3: Suspend Head-Down
If thrusts haven't dislodged the object, use gravity.
- Small dogs: Hold your dog upside down by the hind legs and give 5 firm blows between the shoulder blades with the heel of your hand.
- Large dogs: Lift just the hind legs so the head hangs down — wheelbarrow position. Give 5 firm blows between the shoulder blades.
Check the mouth after each set.
Step 4: Back Blows
With the dog still head-down or on their side, use the heel of your hand to deliver 5 sharp blows between the shoulder blades.
Check the mouth. If you can see the object now, remove it carefully.
Keep Repeating
Cycle through abdominal thrusts, suspension, and back blows until the object comes out or your dog loses consciousness. Get someone else to call the vet or an emergency animal hospital while you work.
If Your Dog Loses Consciousness
If your dog goes limp, move fast.
- Lay them on their side.
- Open the airway — gently pull the tongue forward and to the side. Look in the mouth and remove the object if you can see it.
- Give 2 rescue breaths: close the mouth, cover the nose with your mouth, and exhale gently until you see the chest rise.
- If there's no heartbeat, begin CPR: 30 chest compressions to 2 rescue breaths. Press down on the widest part of the chest at a rate of 100 to 120 compressions per minute. Let the chest fully recoil between compressions.
- Continue until the dog breathes on their own or you reach the vet.
Go to the Vet, Even If It Worked
Even if you dislodge the object and your dog seems fine, go to the vet. Abdominal thrusts and back blows can cause internal bruising or airway injury that isn't visible. Choking can also cause fluid to develop in the lungs afterward. Call ahead on the way so they're ready when you arrive.
Reducing the Risk
Most choking incidents involve toys that are the wrong size, food eaten too fast, or objects a dog shouldn't have access to.
- Match toy size to your dog's size. Anything that fits entirely in the mouth is a risk.
- Avoid toys with small detachable parts.
- Cooked bones splinter — they're a choking hazard. Know what you're giving.
- If your dog gulps food, a slow-feed bowl is one of the more effective changes you can make.
- Watch what they pick up outside, especially on walks.
Print and Keep
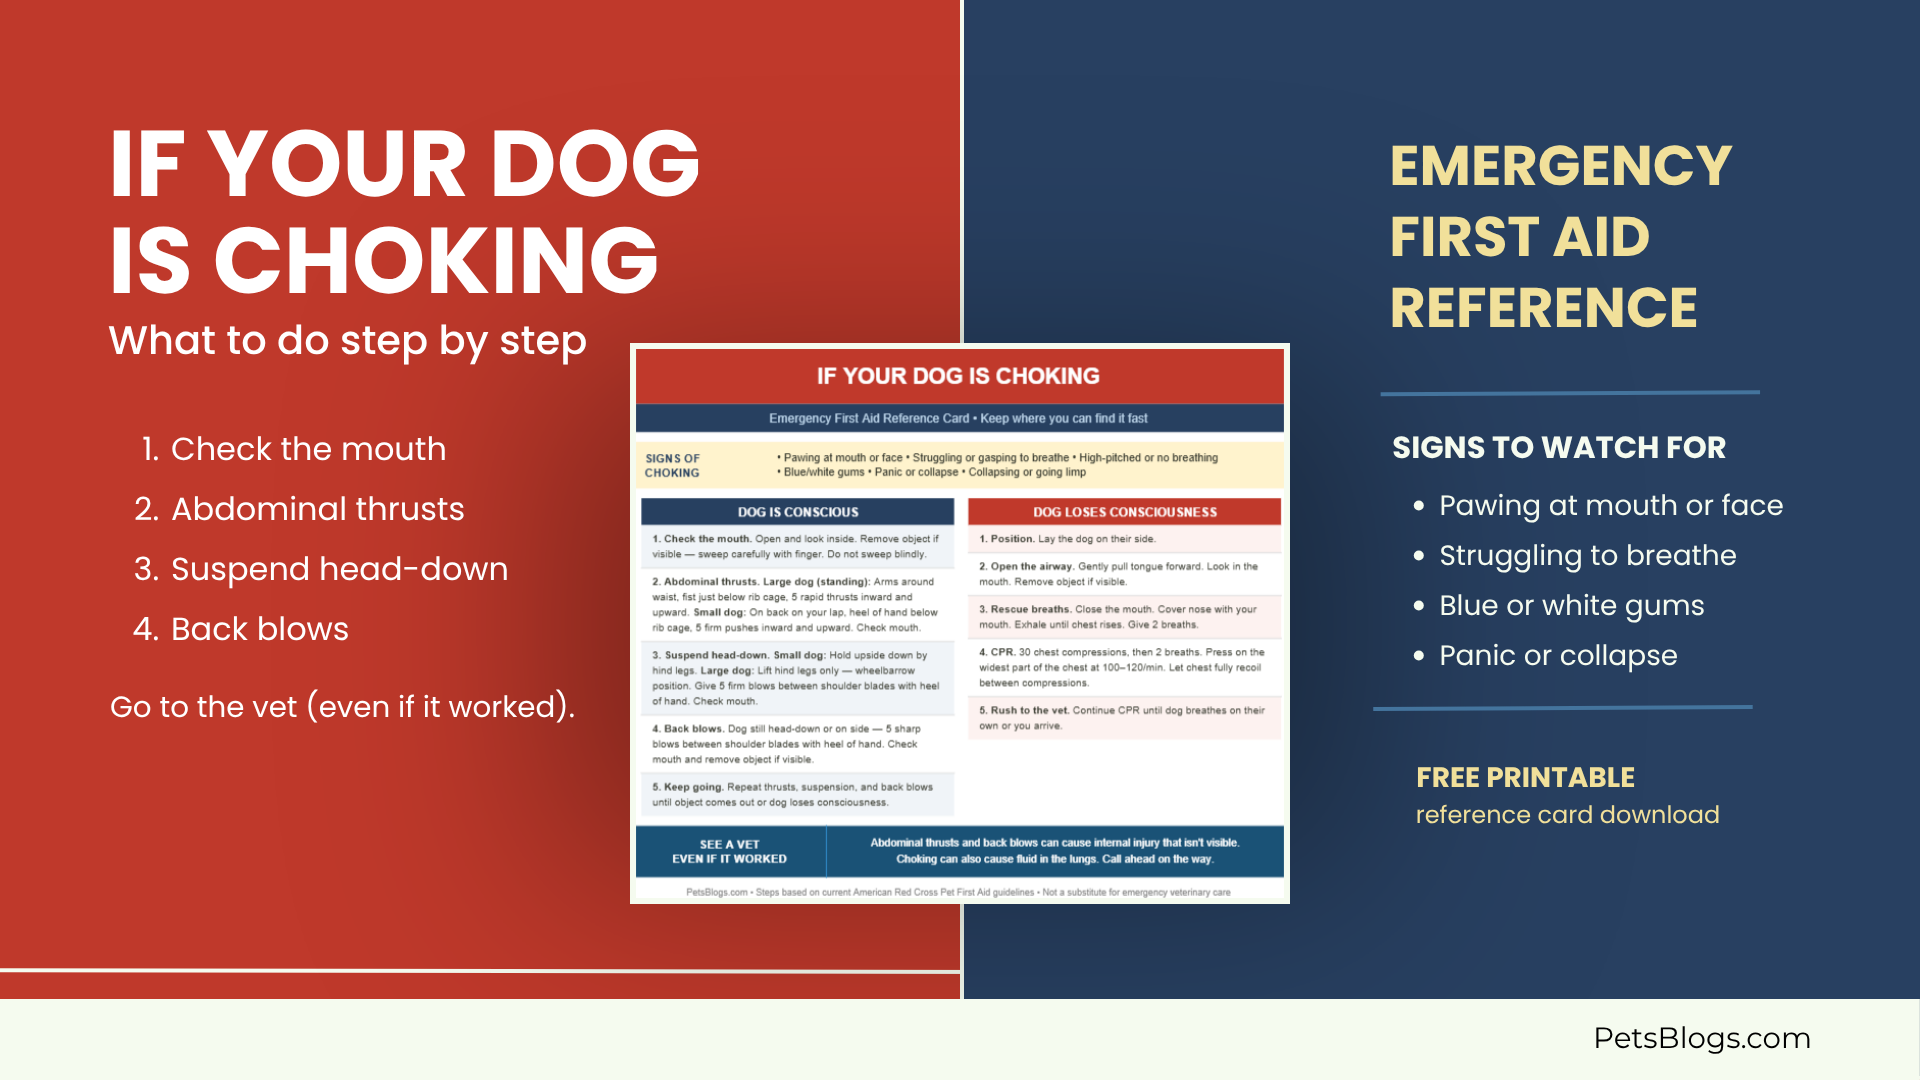
The printable reference card below covers the essential steps on one page. Print it and keep it somewhere you can find it fast — on the fridge, in a pet first aid kit, or wherever you keep your vet's number.
[Download the Dog Choking Emergency Reference Card]
Want to go deeper? The American Red Cross offers a 35-minute Cat and Dog First Aid online course that covers choking, CPR, wounds, seizures, and more. Worth doing before you need it.
Steps based on current American Red Cross Pet First Aid guidelines. This article covers basic first aid and is not a substitute for veterinary care. If your dog is in distress, call your vet or an emergency animal hospital.
Last updated: May 16, 2026
Originally published: April 15, 2008